

Portrait photography is more than just pointing a camera at someone and clicking. A great portrait captures personality, emotion, and story, making the subject shine. Whether you’re an aspiring photographer or just someone who wants to improve their portrait skills, this guide will walk you through everything you need to know about how to take professional portraits.Understanding Portrait Photography
Before picking up your camera, it’s important to understand what portrait photography is. Unlike casual snapshots, professional portraits focus on the subject, their expression, and the mood you want to convey. The goal is to make the person look natural, confident, and relatable.
Professional portraits are often used for social media profiles, business websites, modeling portfolios, family albums, and artistic projects. Every detail—lighting, background, composition, and posing—plays a key role in creating a stunning result.
Choosing the Right Camera and Lens
You don’t need the most expensive camera to take professional portraits, but having the right equipment helps. A DSLR or mirrorless camera is ideal because it allows you to control settings like aperture, shutter speed, and ISO.
Lens choice is also crucial. A lens with a wide aperture (like f/1.8 or f/2.8) creates a shallow depth of field, which blurs the background and makes the subject stand out. Prime lenses such as 50mm or 85mm are popular among portrait photographers because they provide sharp images and beautiful background separation.
Mastering Lighting
Lighting can make or break a portrait. Professional photographers often use natural light, studio lights, or a combination of both.
- Natural Light: Soft, diffused light from a window or during the golden hour (shortly after sunrise or before sunset) creates a warm, flattering look. Avoid harsh midday sunlight as it can create unflattering shadows.
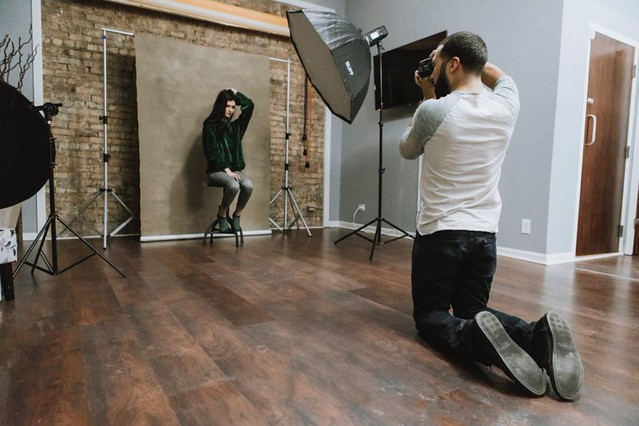
- Artificial Light: Studio lighting gives you complete control. Softboxes, ring lights, and reflectors help balance light and highlight the subject’s features. Experiment with different lighting angles to see what works best.
Remember, the light should enhance the subject, not overpower them.
Background and Setting
A cluttered or distracting background can ruin an otherwise great portrait. Choose a simple, clean background or one that complements the subject’s personality. For outdoor portraits, look for natural environments like parks, gardens, or urban streets with interesting textures. For studio portraits, a solid-colored backdrop often works best.
Also, consider the subject’s clothing and props. Coordinating colors and textures with the background can create a harmonious and professional look.
Posing Your Subject
Posing is key to capturing professional portraits. A natural pose makes the subject feel comfortable and confident. Here are some tips:
- Relax the Subject: Encourage deep breaths, conversation, or laughter to reduce stiffness.
- Angle the Body: Slightly turning the body instead of facing the camera head-on creates a more flattering and dynamic image.
- Use Hands Wisely: Avoid letting hands hang awkwardly. Placing hands on hips, in pockets, or gently touching the face or hair looks natural.
- Facial Expression: A subtle smile, confident look, or thoughtful expression can convey personality. Avoid forcing expressions; let them happen naturally.
Experiment with different angles and poses, and always give feedback to the subject to keep them at ease.
Composition and Framing
Composition refers to how elements are arranged in your photo. Professional portraits often follow simple rules:
- Rule of Thirds: Place the subject off-center to create a more engaging composition.
- Eye Level: Ensure the eyes are in sharp focus. Eyes are the focal point of any portrait.
- Leading Lines: Use natural lines in the environment to guide the viewer’s attention to the subject.
- Negative Space: Leaving empty space around the subject can emphasize them and create a clean look.
Keep experimenting—sometimes breaking the rules can also create unique and compelling portraits.
Camera Settings
Adjusting your camera settings is essential for professional results:
- Aperture: A low f-stop (f/1.8–f/2.8) blurs the background and highlights the subject.
- Shutter Speed: Keep it fast enough to avoid motion blur, usually around 1/125s or faster.
- ISO: Keep ISO low (100–400) to reduce grain and noise.
- Focus Mode: Use single-point autofocus on the eyes to ensure they are sharp.
Shooting in RAW format is recommended as it allows more flexibility during editing.
Post-Processing
Even professional photographers spend time editing their portraits. Editing can enhance colors, remove distractions, and improve skin tone. Popular tools include Adobe Lightroom, Photoshop, and Capture One.
Start with basic adjustments:
- Exposure
- Contrast
- Color balance
- Cropping
- Skin retouching (optional, subtle edits work best)
Avoid over-editing, as natural-looking portraits often feel more authentic and professional.
Connecting with Your Subject
A great portrait isn’t just about equipment and settings—it’s also about connection. Spend time talking with your subject, understanding their personality, and making them feel comfortable. This rapport helps you capture authentic expressions and emotions, which are the heart of professional portrait photography.
Practice and Patience
Like any art form, taking professional portraits requires practice. Experiment with lighting, poses, and settings. Review your work, learn from mistakes, and seek inspiration from other photographers. Over time, your portraits will become more polished, natural, and captivating.
FAQs About Professional Portrait Photography
1. Do I need expensive equipment to take professional portraits?
No, you can start with a basic DSLR or mirrorless camera and a good lens. Understanding lighting, composition, and posing is more important than having the latest gear.
2. What’s the best lighting for portraits?
Soft, diffused light works best. Natural light during golden hour or controlled studio lights can create flattering results. Avoid harsh midday sunlight.
3. How do I make my subjects feel comfortable?
Talk with them, give gentle directions, and encourage movement or laughter. A relaxed subject leads to more natural portraits.
4. What lens should I use for professional portraits?
Prime lenses between 50mm–85mm with a wide aperture (f/1.8–f/2.8) are ideal. They produce sharp images and nicely blurred backgrounds.
5. Can I edit portraits without making them look fake?
Yes, subtle adjustments like exposure, contrast, and minor skin retouching enhance a photo without losing its natural feel. Avoid over-editing.
Conclusion
Taking professional portraits is a combination of skill, creativity, and patience. With the right camera, lighting, composition, and connection with your subject, you can create images that are not only visually appealing but also emotionally engaging. Start practicing today, experiment freely, and watch your portrait photography skills grow.